Thursday, September 10, 2009

California Dreamin': Kate's Chunky Guacamole

Our friend, Trent, posted a comment the other day saying that my blog reminded him of the fresh produce we’re able to enjoy in this geographic region during this time of the year. (He’s currently living abroad, and has been for quite some time now.) I think that one of the interesting things about being in other cities is not only seeing what different kinds of cuisines people enjoy, but also what local produce they have access to. This can create a little jealousy, while also making you grateful for what you have.


Whenever possible, I enjoy visiting farmers’ markets in other cities. California, in particular. I am still so amazed that they can walk to the market and purchase fresh lemons, limes, oranges, and avocados that are straight from the farm (that haven’t rolled around in the back of a truck for a week). When I was talking with a colleague about this, he informed me that when he lived in Miami, he had an avocado tree in his backyard. He had so many avocados he didn’t know what to do with them! (If he had shipped them up here, he would have made a lot money!)

Being that they aren’t grown locally, avocados can be a little pricey in these parts, but they are oh, so worth it! I love putting avocados on a sandwich, a salad, and making everyone’s favorite dip – guacamole!

I have spent several years experimenting, and fine-tuning my recipe. We’ve eaten at several restaurants where the guacamole is delicious (Lime in Denver, Dos Caminos in NYC), however my husband and I think that my version holds up to those quite well. (And ordering tableside guacamole is always interesting because you can actually see what they are putting in to the dip!) What’s fun about guacamole is that you can add or omit ingredients based on your own taste buds. If I’m serving to a crowd at a party, I go easy on the garlic. If children are going to be trying it, I omit the jalapeño.

Kate’s Chunky Guacamole
Ingredients
4 Ripe Haas avocados
1 Roma tomato, diced
1 Garlic clove, minced (optional)
¼ Cup Onion, diced
¼ Cup Cilantro, coarsely chopped
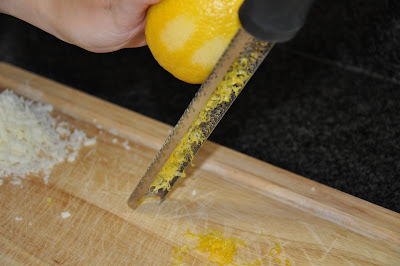
1 Lime, juice and zest
½ tsp. chili powder
1 Jalapeño, seeded and minced (optional)
½ tsp. garlic powder
½ tsp. freshly ground black pepper
¼ tsp. kosher or sea salt

Directions
Zest lime, set aside, and juice lime.

Cut the avocados in 1/2, remove the pits, and scoop the flesh out of their shells into a large bowl. Pour lime juice over avocados. Using a potato masher, mash the avocados with the lime juice, chili powder, garlic powder, pepper, and salt, leaving them partially chunky. With a spoon or spatula, fold in tomato, onion, minced garlic, jalapeño, lime zest, and cilantro. Serve immediately, or press a piece of plastic warp down on guacamole and refrigerate until serving.

Serve with tortilla chips, or to accompany an entrée.


Wednesday, September 9, 2009

The Return of the Shells: Turkey and Artichoke Stuffed Shells

Stuffed shells were actually one of the first meals that my husband cooked for me when we started dating. It was a little over nine years ago, and in his college apartment he sautéed some bell peppers, stuffed them in jumbo pasta shells, and topped them with soy cheese. We ate shells, drank cheap wine, and had a movie marathon that night. His meal was impressive, thoughtful, and quite good. He made me a few more noteworthy meals after that, but then quickly allowed me to take over the shell-stuffing duties (and basically all other cooking) in our household. While some say he’s lucky, I believe that I am lucky too because I get to cook for someone who wants to eat my food all of the time!

I find myself in an interesting position right now to be blogging to you about a dish that I have never tasted myself. I’ve made this about a dozen times for my husband (which he has graciously shared with some colleagues on occasion), and also for our dear friend “K”. But until I find a soy version of ground turkey, I’ll have to rely on their opinions...

They all LOVE this dish. In fact, we simply refer to this dish as “shells” in our household. I think this is a perfect dish to make and package up for later servings. I’ll make a batch and then pack them in his lunch throughout the week. My husband thinks of this dish to be like a lighter version of meatballs tucked inside coats of pasta.

This is one of the many Giada De Laurentiis recipes that I cook. At this point I can’t even begin to count how many recipes of hers that I have tried, but all have had one thing in common – they are delicious! We’ve never been disappointed by any of her recipes. With each new dish, we say, “Giada does it again!” In this recipe, Giada calls for Arrabbiata sauce, however I always use my traditional marinara, seasoned with a little extra crushed red pepper.

I haven’t made this recipe since last winter, and my husband was so excited when I announced the return of the shells this week. Last night after work we found ourselves contemplating a few restaurants in the area to grab dinner at, but his response was, “There are shells at home in the fridge, right?” I confirmed and we made our way back home to enjoy an evening in with shells, and some nice wine this time.

Turkey and Artichoke Stuffed Shells
(From Everyday Pasta)

Ingredients
* 1 (12-ounce) box jumbo pasta shells (recommended: Barilla)
* 3 tablespoons extra-virgin olive oil
* 1/2 large yellow onion, chopped (about 1 cup)
* 3 cloves garlic, chopped
* 1 pound ground turkey
* 1/2 teaspoon kosher salt, plus 1/2 teaspoon
* 1/4 teaspoon freshly ground black pepper, plus 1/4 teaspoon
* 1 (8 to 10-ounce) package frozen artichokes, thawed and coarsely chopped
* 1 (15-ounce) container ricotta cheese
* 3/4 cup grated Parmesan
* 2 eggs, lightly beaten
* 1/4 cup chopped fresh basil leaves
* 2 tablespoons chopped fresh flat-leaf parsley
* 5 cups Marinara Sauce
* 1 1/2 cups grated mozzarella (about 5 ounces)

Directions
Preheat oven to 350°F.

Bring a large pot of salted water to a boil over high heat. Add the pasta and partially cook until tender but still very firm to the bite, stirring occasionally, about 4 to 5 minutes. Drain pasta.

Meanwhile, in a large heavy skillet, heat the olive oil over medium-high heat. Add the onions and the garlic and cook until the onions are soft and starting to brown, about 3 minutes. Add the ground turkey, 1/2 teaspoon salt, and 1/4 teaspoon black pepper and continue to cook, stirring occasionally, until the meat is slightly golden and cooked through. Add the artichoke hearts and stir to combine. Remove from heat and let cool.

In a large bowl combine the cooled turkey mixture with the ricotta cheese, Parmesan cheese, eggs, basil, parsley, and the remaining salt and pepper. Stir to combine.

Cover the bottom of a 9 by 13 by 2-inch baking dish with 1 cup of Marinara sauce. Hold a shell in the palm of your hand and stuff it with a large spoonful of turkey mixture, about 2 tablespoons. Place the stuffed shell in the baking dish. Continue filling the shells until the baking dish is full, about 24 shells. Drizzle the remaining Marinara Sauce over the shells, top with the grated mozzarella. Bake until the shells are warmed through and the cheese is beginning to brown, about 25 minutes.


Tuesday, September 8, 2009

Corn-Off-The-Cob: Kate's Cilantro Citrus Corn

Corn has long been one of my favorite vegetables. It is one that brings me back to my childhood. I have memories of sitting out on the deck on a hot summer day, shucking ears of corn with my sister. I remember it being so challenging to try to remove all of the silk strands off the corn, but I always tried to get all of them. My mother would boil the corn, and we’d serve it with little plastic yellow corn holders (which looked like miniature ears of corn) that pierced each end of the cob. I’d spread butter all over the corn, and sprinkle it with salt, and the twirl the corn around and eat it from side to side until all of the kernels were eaten.

Twenty-five years later the little yellow plastic corn holders are long gone, but we’re still enjoying corn on the cob, and this evening I sat on my deck and tried to remove the little threads of corn silk. We bought a baker’s dozen from a roadside farm last weekend. I try to buy corn as much as I can during it’s peak season. We toss it on the grill (coated in a little olive oil), and then once it cools I cut the kernels off the cob, package it up, and put it in the freezer to pull out in the upcoming months when fresh corn is no longer available.

While I believe that corn needs nothing more than a little butter and salt (and is actually delicious on it's own), I sometimes add a few more ingredients to incorporate some new flavors. I really enjoy this with cilantro, but you could add whatever herbs you prefer.

Cilantro Citrus Corn
Ingredients
6 shucked ears of fresh corn on the cob
¼ cup butter (1/2 stick), melted
2 Tbs. lemon juice
½ tsp. kosher salt
¼ tsp. freshly ground pepper
1/8 tsp. cayenne pepper
¼ cup fresh cilantro, coarsely chopped

Directions
Cook corn by your desired method (boil in a covered pot of water for approximately 5 minutes; or, coat with olive oil and grill on high heat for 6-8 minutes, rotating frequently). Allow corn to cool. Taking one cob at a time, use a large knife to cut kernels off the cob, cutting from one end to the other.

Combine melted butter, lemon juice, salt, pepper, and cayenne. Toss butter mixture with corn in a large bowl, trying to coat all the corn kernels. Add cilantro, toss gently, and serve.


Monday, September 7, 2009

Favorite Salmon Salad - Summer Salad with Cumin-Crusted Salmon

My mother found this recipe several years ago in the USA Weekend Magazine, and it became an instant family favorite. It comes together easily and is quite healthy. There are so many ingredients in this salad that I love, and that are so good for you. What’s also nice about serving this salad as an entrée, is that it while it is light, it is actually quite filling.

Summer Salad with Cumin-Crusted Salmon
Salad:
2 ounces pine nuts
5 cups mixed greens
15-ounce can black beans, drained and rinsed
1 cup scallions, sliced
1 large orange, cut into 1-inch chunks
1 cup cilantro, chopped

Dressing:
2 Tbs. orange juice concentrate
4 Tbs. olive oil
½ tsp. cumin
1 ½ Tbs. balsamic vinegar
2 garlic gloves, crushed
¼ tsp. salt

Cumin-Crusted Salmon:
1 ½ Tbs. cumin
2 tsps. Paprika
¼ tsp. salt and freshly ground black pepper
1 pound salmon fillet, skin removed

Heat a non-stick skillet, add pine nuts and stir until toasty, about 5 minutes. In a large bowl, place all salad ingredients (reserve half of the cilantro and half of the pine nut for garnish).

In a separate bowl, stir dressing ingredients together.

In a bowl, combine cumin, paprika, salt and pepper. Cut salmon into 8 strips and coat with spices. Grill (or sear in a non-stick skillet brushed with canola oil) until crusty.

Toss salad and dressing; divide on plates. Top with salmon and reserved cilantro and pine nuts.

Note – I discard of the whole crushed garlic cloves before serving the dressing. I would like to warn against mincing the garlic and serving it in the dressing – you’ll be tasting it still the next morning!


Sunday, September 6, 2009

Labor Day Picnic

I would like to wish everyone a happy Labor Day! We enjoyed cheering our favorite football team on to a much-needed win, and then spent the weekend at the lake with family. Weekends like these usually involve spending the day cooking and preparing a feast for dinner. My mother, sister, and I will all work together to test new recipes and put together our favorite tried-and-tested dishes. My father, brother-in-law, and husband are all grilling experts, and this summer they actually brought a smoker into the mix as well!

This weekend, however, we didn’t slave away in the kitchen, and instead enjoyed the beautiful weather outside. However, before heading out for dinner, we did put together a little wine and cheese hour in the late afternoon. Per a suggestion in the most recent Trader Joe circular, The Fearless Flyer, we tried the Villa Carlotti Prosecco. It comes in a beautiful blue glass bottle, and is a steal at $4.99 a bottle! We paired it with the Trader Joe’s Goat Gouda, made from 100% goat’s milk and aged for 90 days to bring out the rich, nutty flavor, along with some sliced Bartlett Pears that were fresh from the farmers’ market.

The combination of the three were completely refreshing and quite complimentary. It was the perfect afternoon snack to enjoy outside on a picnic blanket on a beautiful sunny day!

Wednesday, September 2, 2009

Labor Day Dish - Lemony Pea and Pistachio Pesto Pasta Salad

With Labor Day weekend approaching, I’d imagine that people are buying charcoal for their grill, filling their fridge with beer, and figuring out what to make to accompany whatever meat they intend to grill. If you’re looking for something in the pasta salad department, I just might have the recipe for you!

My mother made this pasta salad about one month ago, and I was lucky enough to be around to try it. I could not get over how fresh it tasted. The bright flavor of the lemon zest, the freshness of the mint, and the cool green color from the pureed green peas create a unique dish that is not your typical pasta salad. As the ingredients might seem a bit obscure for a pasta salad (fresh mint?), I beg you to try. You will be surprised and you will be pleased.

This dish serves quite well at room temperature, as a good picnic salad should. I used a tri-color pasta which I think gives the dish even more color, although it is not necessary. I used toasted pine nuts (which I keep a huge bag of from Costco my freezer) instead of pistachios. The Pecorino Romano cheese gives this dish quite a sharp, salty bite. I’m usually all for finding more convenient substitutes, and while I think Parmigiano-Reggiano could work, it is worth to purchase a hunk of Pecorino Romano because it really does add to the flavor. The mint in my “garden” has been struggling lately, and I only had enough for one tablespoon. I added basil (of which I have plenty) for the second tablespoon. I also added some more Pecorino Romano and pine nuts to garnish the dish before serving.

This is also a great make ahead dish. So 'wow' your friends and family this weekend with this pasta salad, and have a safe and relaxing weekend!

Lemony Pea and Pistachio Pesto Pasta Salad
(From Cook's Country Best Grilling Recipes)
Serves 8 to 10

Toast the nuts in a dry skillet over medium heat, stirring frequently, until fragrant, about 5 minutes.

1 pound penne pasta or fusilli or campanelle
Salt
1/4 cup ricotta cheese
1 1/4 frozen peas , thawed
1/2 cup unsalted pistachios , toasted and chopped
1/4 cup grated Pecorino Romano cheese
1/4 cup extra virgin olive oil
1 garlic clove , minced
2 tablespoons chopped fresh mint
1 tablespoon grated lemon zest
1/2 teaspoon pepper

1. Bring 4 quarts water to boil in large pot. Add pasta and 1 tablespoon salt to boiling water and cook until just past al dente. Reserve 3/4 cup pasta water. Drain pasta in colander, rinse with cold water until cool, drain once more, and transfer to large bowl.

2. Puree ricotta and 2 tablespoons hot pasta water in food processor until smooth. Add 3/4 cup peas, 1/4 cup pistachios, Pecorino Romano, oil, garlic, mint, zest, pepper, and 1/2 teaspoon salt and puree until smooth. Stir pesto into pasta until well coated, adding reserved pasta water as needed to adjust consistency. Fold in remaining peas and pistachios. Season with salt. Serve.

Make-Ahead: This salad can be refrigerated for 3 days. Bring to room temperature before serving and thin salads with a few tablespoons of warm water if needed.

Tuesday, September 1, 2009

More Tomatoes - Kate's Roasted Tomato & Cognac Soup

I mentioned to you yesterday that we ate our delicious Sweet and Spicy Grilled Cheese Sandwiches with a soup that I made over the weekend. I wasn’t going to leave you hanging! Here is a brand new recipe I concocted.

At the farmers’ market last week I purchased bushel of tomatoes, and wanted to make something that would allow us to savor them as long as possible. The beauty of making soups is that they (can) last forever – well, at least six months in your freezer. I love making soups because they make so much food, and can incorporate so many wonderful vegetables. As a working professional, soups are a true blessing in that I can come home after a long day and still eat a homemade meal. I pull a serving out of my freezer, defrost, and serve with a salad or a sandwich.

This recipe was inspired by a tomato and cognac soup I have long been enjoying at Sweet Lorraines’s. (No known relation to the Patty Griffin song, but equally as awesome.) I haven’t had their version for several months, so my recipe is not an exact replica, but the general idea is there by flavoring the caramelized tomatoes with cognac. My batch from the weekend is still in the fridge, and as I’ve been pulling it out each night when I get home, I’m not sure that it will make it to the freezer. This is certainly one we’ll try again.

Kate's Roasted Tomato & Cognac Soup
Ingredients
* 2 ½ lbs fresh tomatoes, halved and cored
* ¼ cup, plus 2 tablespoons Extra Virgin Olive Oil
* 1 onion, chopped
* 3 cloves of garlic, minced
* 2 cups vegetable broth
* 2 - 6 oz. cans tomato paste (preferably with Italian seasoning)
* ½ cup cognac
* 4 sprigs fresh thyme
* 1 cup 2% milk (or ¾ cup heavy cream)
* Salt and fresh freshly ground pepper, to taste
* Crushed red pepper, to taste

Directions
Preheat oven to 450°F.

Spread tomatoes on a baking sheet, drizzle with ¼ cup of olive oil and season with salt and pepper. Roast in oven for approximately 25-30 minutes, until tomatoes are caramelized.

In a large stock pot, heat 2 tablespoons of olive oil over medium heat. Add onions and sauté for 10 minutes, until onions are tender and just beginning to brown. Add garlic and sauté for an additional 2 minutes. Add tomato paste and stir constantly for 2-3 minutes, until paste is incorporated into onion and garlic mixture. Add cognac to deglaze the pan and cook for 3 minutes, until most of the liquid is evaporated. Add roasted tomatoes and all of their juices, along with vegetable stock and fresh thyme sprigs (on stem). Bring to a boil, then reduce heat and simmer for 20 minutes.

Remove from heat and discard of thyme sprigs. Use an immersion blender to puree to your desired consistency (longer for a smooth soup; briefly for a chunky soup). Return to low heat and season with salt, pepper, and crushed red pepper. Stir in milk or heavy cream and cook for 5 minutes. (Note: If your soup is too thick, you can add more vegetable broth or milk/cream.)