I’ve been sharing recipes through this blog for a couple months now, and I’m also excited that readers have started sharing recipes with me! My friend Christina emailed me with several of her favorite recipes last week. As I read through them, I grew really excited because they all incorporated so many ingredients that I enjoy cooking with. It was hard to decide which one to begin with, even with the recommendations she narrowed down for starters.
Her Summer Orzo Salad caught my eye because I already had all (but one) of the ingredients in my pantry or refrigerator. At first glance, the salad sounds sweet with the juice and fruit, however the mustard, salt, and garlic add a savory element to it. The one ingredient I lacked was the raisins, so I substituted dried cranberries instead, which tasted great and added a hint of fall to an otherwise summery salad. I also only needed 1/3 cup of extra virgin olive oil.
The was absolutely delicious and very easy to make! I can’t wait to make this salad again to share with other people!
Summer Orzo Salad
Ingredients
1 lb. box orzo pasta
1/3 cup orange juice
½ cup dry apricots, chopped
½ cup golden raisins (or dried cranberries)
Zest from 1 lemon
1 Tbs. garlic, minced
1 tsp whole grain mustard
2 tsp kosher salt
1 tsp freshly ground black pepper
1 (4 oz.) package goat cheese, crumbled
½ cup basil, coarsely chopped
2/3 cup extra virgin olive oil
½ cup pinenuts, toasted
Directions
Cook pasta al dente, drain and rinse with cold water. Allow to cool at room temperature. While pasta is cooling, combine orange juice, apricots, raisins, lemon zest, garlic, mustard, salt, and pepper. Fruit will plump and soften slightly. Toss Fruit mixture with cooled pasta, cheese, basil, olive oil, and pine nuts. Chill for at least one hour before serving.
Tuesday, September 29, 2009
Monday, September 28, 2009
Blackout Dip: Kate’s Layered Taco Dip
I find myself making my layered taco dip frequently for gatherings. It’s a popular dish that everyone seems to enjoy. My husband loves it too. I used to make a batch for the two of us to sit down and eat for dinner. In fact during the first night of the Northeast Blackout in August 2003, we sat on our couch in our Manhattan apartment finishing the layered taco dip we had started the night before (that would have spoiled in the fridge), and drinking the leftover margaritas (that would have melted in the freezer).
This is a flexible dip, as different layers can be added and omitted based on your personal preferences. I think everyone has their own version of Layered Taco Dip. Some include seven layers; some have nine. I have seen some recipes that mix cream cheese with sour cream. When I made this the other day, I actually added Greek yogurt as I was short on sour cream. Whichever way you choose to make yours, I beg you leave out the black olives if you’re serving to a crowd. I find it hard to find someone who is a fan of black olives. If you ever watch people at a party eating layered taco dip, notice how they take their tortilla chips and try to scoop around the olives, leaving a pile of black olives for clean up. You can hold the olives, and instead garnish with chives, green onion, cilantro, and/or chopped jalapeño. This dip doesn't keep well for long, so it's best to make this right before serving.
Kate’s Layered Taco Dip
Ingredients
1 (16 oz.) can refried beans (I use fat free vegetarian beans)
1 (16 oz.) container of light sour cream
1 (1 oz.) package low-sodium taco seasoning
½ recipe Kate’s Chunky Guacamole
2 cups shredded cheese (Mexican or Taco variety – one that includes Monterrey Jack and Cheddar)
3 tomatoes, diced
¼ cup chopped chives or green onion
Directions
Remove beans from can and to remove excess liquid, drain in a colander lined with paper towel. Spread beans on a large platter.
In a small bowl, mix sour cream with taco seasoning. Spread on top of beans, leaving the edge of the beans visible.
Make ½ recipe of Kate’s Chunky Guacamole. Carefully spread on top of sour cream, leaving the edge visible.
Sprinkle cheese on top of guacamole, and top with tomatoes. Garnish with chives or green onion. Serve immediately with tortilla chips.
Friday, September 25, 2009
Two-for-One: Roasted Winter Vegetables & Soup, with Kate’s Toasted Baguette with Gruyere
I love making soups year-round, but the root vegetables of fall and winter give way for making soups with a thick consistency, and adding nothing more than a little seasoning and broth. Roasting the vegetables caramelizes them, making them soft enough to quickly puree with some broth. I make soups with all different variations of root vegetables, and this Ina Garten recipe combines them all.
This recipe is really a two-for-one. The first part leaves you with a colorful and delicious side dish of roasted vegetables. You can leave them as is to serve along with an entrée , or puree them into a soup. This is a great soup to make in the cooler months of the year, but for some reason I also find myself craving this soup in the spring with a light salad.
This evening we ate this soup with a variation on a grilled cheese. The crusty baguette and gooey cheese are a great compliment to the warm hearty soup, and I like to dip pieces of the bread into my soup bowl. The splash of chardonnay on the baguette is a nice touch that adds another layer of flavor, and freshly ground black pepper adds a little kick.
Her recipe calls for chicken stock, however I use vegetable stock. I puree the soup with an immersion blender in the stock pot, rather than transferring to a food processor.
Roasted Winter Vegetables & Soup
(From Barefoot Contessa Family Style)
Roasted Vegetables:
Ingredients
1 pound carrots, peeled
1 pound parsnips, peeled
1 large sweet potato, peeled
1 small butternut squash (about 2 pounds), peeled and seeded
3 tablespoons good olive oil
1 1/2 teaspoons kosher salt
1/2 teaspoon freshly ground black pepper
2 tablespoons chopped fresh flat-leaf parsley
Directions
Preheat the oven to 425° F degrees.
Cut the carrots, parsnips, sweet potato, and butternut squash in 1- to 1 1/4-inch cubes. All the vegetables will shrink while baking, so don't cut them too small.
Place all the cut vegetables in a single layer on 2 sheet pans. Drizzle them with olive oil, salt, and pepper. Toss well. Bake for 25 to 35 minutes, until all the vegetables are tender, turning once with a metal spatula.
Sprinkle with parsley, season to taste, and serve hot.
Roasted Vegetable Soup:
Ingredients
3 to 4 cups vegetable stock
1 quart Roasted Winter Vegetables (see recipe above)
Kosher salt and freshly ground black pepper
Directions
In a large saucepan, heat 3 cups of vegetable stock. In 2 batches, coarsely puree the roasted vegetables and the vegetable stock in the bowl of a food processor fitted with the steel blade. Pour the soup back into the pot and season, to taste. Thin with more vegetable stock and reheat. The soup should be thick but not like a vegetable puree, so add more vegetable stock and/or water until it's the consistency you like.
Kate’s Toasted Baguette with Gruyere
Ingredients
1 French baguette
2 tablespoons extra virgin olive oil
4 tablespoons white wine (like chardonnay)
1 cup gruyere, grated
Freshly ground black pepper, to taste
Directions
Preheat oven to 350° F degrees.
Slice baguette into thirds, and then slice each section in half horizontally. Place baguette slices on a large baking sheet, cut side up. Drizzle bread with extra virgin olive oil. Bake in oven for approximately 6-8 minutes, until bread is crispy. Remove from oven.
Splash white wine over baguettes, sprinkle with gruyere, and season with freshly ground black pepper. Turn broiler on high, and toast baguettes until cheese is melted and bread is toasted (approximately 2-4 minutes). Serve immediately.
Thursday, September 24, 2009
Staff Meeting Surprise: Zucchini Chocolate Chip Bars
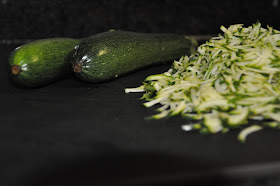
Based on my recent posts, you may not believe it, but I do buy produce other than tomatoes at the farmers’ market. In fact, I did yesterday. I stopped by my local market on the way to work (alright, I went there intentionally to buy tomatoes). I made my tomato purchase and started to walk away, but turned back and also picked up some bright green zucchini that were staring at me. Instead of roasting, grilling, or tossing the zucchini into a soup, I decided to bake with it.
A few weeks ago a colleague who regularly pawns off shares her baked goods at staff meetings brought in a zucchini cake that contained chocolate chips. I’m up for trying anything with chocolate. I got my hands on a copy of her recipe and gave it a whirl tonight. The recipe says that you can substitute nuts for the chocolate chips, but I don’t know why anyone would want to do that. In fact, I think it would be good with both. The frosting is more of a glaze, and while it's seasoned with cinnamon, there are several different variations you could do, or just leave it out altogether if you're looking for something less sweet.
These are quite good, and an untrained taste bud might not even notice the zucchini in these! They are a fun treat for brunch, dessert, or your next staff meeting!
Zucchini Chocolate Chip Bars
Ingredients
¾ Cup butter, at room temperature
½ Cup brown sugar
½ Cup granulated sugar
2 Eggs, at room temperature
1 Teaspoon vanilla
1 ¾ Cup flour
¼ Teaspoon salt
1 ½ Teaspoons baking powder
2 Cup shredded zucchini
1 Cup shredded coconut
1 Cup mini chocolate chips (or substitute chopped walnuts/pecans)
Directions
Preheat oven to 350° F degrees.
Cream butter; add sugars gradually, add eggs one at a time. Beat in vanilla. Add dry ingredients. Stir in zucchini, coconut and nuts/chips. Spread in greased 15x10x1½ inch pan. (You can use a 9x13 inch pan and it will come out thicker and a bit more cake-like.)
Bake for 40 minutes (check and bake a little longer if in 9x13 pan). Cool completely and then frost.
Cinnamon Frosting
Ingredients
1 Cup powdered sugar
2 ½ Tablespoons milk
1 ½ Tablespoons butter, at room temperature
1 Teaspoon vanilla
½ Teaspoon cinnamon
Directions
Beat until smooth. Spread on bars.
Tuesday, September 22, 2009
Tuesday in Point Reyes: Kate’s Point Reyes Avocado Sandwich
I have a confession to make. I am a planner. I love to make lists, and even have a "book of lists". When I plan a vacation, I really plan it. Particularly the meals. I scout out restaurants way in advance, reading reviews, checking ratings, and asking friends and acquaintances for recommendations. I even memorize the menus and determine which items I want to order in advance. During our last trip to California, I did a substantial amount of planning, however I did not plan for it to be Tuesday.
After waking from our last night in San Francisco, we picked up our rental car, drove across the Golden Gate Bridge (Full House, anyone?), and spent some time in the Marin Headlands taking foggy pictures of the bridges and the bay.
We drove north through Mt. Tamalpais State Park, and then on to Point Reyes Station, where we planned to eat lunch before heading out to the Point Reyes National Seashore and Lighthouse.
We discovered Cowgirl Creamery cheese last year at the San Francisco Ferry Building Marketplace, and had planned to treat ourselves to some more Mt. Tam and Red Hawk cheese at their original creamery in downtown Point Reyes Station. Much to our chagrin, they were closed. Closed on Tuesday? Who closes on a Tuesdays? Sure, maybe Sunday, or even Monday. But Tuesday? We were starving, pressed for time, and had nowhere to eat. We got back in the car, and drove down the main drag (which is only about two blocks), and at the end of the row, we saw the Station House Café.
We checked the menu, saw many options to our liking, and also noticed that they had a beautiful garden for dining alfresco. Little did we know that we had stumbled upon a local gem! The Station House Café uses fresh, organic and sustainable ingredients from local farmers and from their own gardens. (They are open six days a week. Tuesday is one of those days!) My husband ordered their clam chowder and a bacon and fried oyster omelet. I was on a kick of trying to eat as many avocadoes as possible while on the west coast, and ordered their Avocado Sandwich. The sandwich tasted so fresh, and was so healthy with all of the veggies loaded on it. It was an $8 sandwich, and turned out to be one of my more memorable meals on our 10-day trip! Sometimes it’s okay not to plan everything.
Our lunch in Point Reyes was only day 4 of our trip, and I could not stop thinking about this sandwich for the rest of the week! I replicated it the first night we returned home, and haven’t stopped since. Each time I make it, it seems to taste better and better. You need to have several fresh ingredients around for this, and if you purchase pre-sliced vegetables (for example, mushrooms and carrots), your assembly will go quite quickly. In lieu of making a tomato coulis, as their version calls for, I simply use tomato paste (which I love and will gladly eat out of the can with a spoon. Or my finger.). Not only do I love the tastes and textures of this sandwich, but the colors are beautiful too!
Kate’s Point Reyes Avocado Sandwich
Ingredients
(Please note that the ingredient measurements are listed per sandwich. You should adjust the quantities for the number of sandwiches you wish to make.)
* 2 slices whole grain or wheat bread
* ¼ avocado, sliced
* 1 tablespoon Italian Seasoning Tomato Paste
* ¼ cup cremini mushrooms, sliced
* ¼ cup broccoli sprouts
* 2 tablespoons sliced carrots
* 2 tablespoons green onion, trimmed, quartered lengthwise, and cut into 2-inch lengths
Directions
Lightly toast bread in toaster or toaster oven. Allow bread to slightly cool so it is easy to handle. Spread tomato paste on one side of each slice of bread. Layer remaining ingredients on one slice of bread. Finish by topping with other bread slice, and cut in half to serve.
Monday, September 21, 2009
Fall Fare: Kate’s Pumpkin Chipotle Salmon & Spaghetti Squash
In the middle of the summer I was at a local food specialty store that carries the American Spoon products. I am a fan of a lot of their products (one in particular, which I’ll write about soon), and picked up a new jar that caught my eye. The Pumpkin Chipotle Roasting Sauce that I purchased has been burning a hole in my pantry since then. I kept prolonging opening it up as I waited for autumn to come. On Sunday, however, I was running errands and saw Christmas decorations and supplies at several stores. The vision of Christmas cards and wrapping paper triggered me into running home to open up my special fall sauce at an attempt to savor autumn as much as possible before is it actually time to purchase Christmas cards and wrapping paper.
I decided to try out my sauce with salmon and spaghetti squash. My husband and I both love spaghetti squash. If you haven’t tried it before, I encourage you to do so. It’s a versatile vegetable that is not typically utilized widely. It’s not common to see it on a restaurant menu, however last summer we were dining at Burke’s Chophouse in Jackson Hole, Wyoming, and much to our surprise, spaghetti squash (not green beans, broccoli, or something else more typical) was the vegetable of the day! Spaghetti squash tastes delicious simply roasted with olive oil, salt, pepper, and nothing more. Seriously, that’s it. It also works well as a pasta substitute – top it with your favorite marinara sauce, toss it with some sautéed vegetables, or throw in some chopped fresh herbs. The squash, salmon, and Pumpkin Chipotle were the perfect trifecta. The Harvest Moon Pumpkin Ale was a nice compliment!
Kate’s Pumpkin Chipotle Salmon & Spaghetti Squash
Ingredients
* 1 whole spaghetti squash
* 3 tablespoons extra-virgin olive oil
* American Spoon Pumpkin Chipotle Roasting Sauce (you will use about ½ jar)
* 4 skinless salmon fillets
* Kosher salt, to taste
* Freshly ground pepper, to taste
* 1 tablespoon fresh Italian parsley, chopped
Directions
Preheat the oven to 450° F.
Split the squash in half and scrape out seeds. Line a baking sheet with aluminum foil. Season the spaghetti squash with olive oil, salt, and pepper. Place flesh side down and bake for 40 minutes. Remove from oven and turn squash so flesh side is facing up. Bake for an additional 10 minutes. Remove from the oven and allow to cool. When squash are cool enough to handle, use a fork to scrape against flesh to pull out the strands of the squash.
Meanwhile, place salmon fillets on a foil-lined broiling pan. Season with salt, pepper, and brush with Pumpkin Chipotle sauce (about 1 tablespoon per fillet). Bake in 450° F oven for approximately 6 minutes. Turn broiler on high, and move pan to top rack in oven. Broil for 2-4 minutes, until sauce on salmon has caramelized on top.
Toss squash in a large bowl with about ¼ cup Pumpkin Chipotle sauce, season with more salt and pepper, if needed. Place squash on plates, top with salmon fillet, and garnish with Italian parsley. (And serve with a chilled pumpkin beer!)
Sunday, September 20, 2009
Time to Tailgate: Mini Bacon and Potato Frittatas
I’ve never really caught on to the whole tailgating bandwagon. First, I like to sleep in. Waking up early on a Saturday morning for a sporting event is a concept that makes no sense to me. Second, beer doesn’t taste good to me anytime of day, let alone before noon. Third, tailgating makes a day with a long football game incredibly longer and with the weekends seeming to go by quicker each year, my time on a Saturday to run errands and do chores is precious. So while my husband makes a day of it each football Saturday, I’ll join in just once in a while.
One of those days happened to be last Saturday. We went out to cheer on our favorite football team to our third victory this season!!! It was a beautiful September day, and we had plans to visit one of my husband’s friend and colleague’s tailgates. “J”’s tailgates are actually a great stop before the game. His tailgate spot is about a block from the stadium, and J makes delicious egg and English muffin sandwiches on his grill. They are delicious.
As it was an earlier game that day, I decided to bring breakfast fare. I also wanted it to be finger food to cut out the need for utensils. I came across a recipe from Cooking Light. I hadn’t tried it before, but learned that my sister had previously made it. These mini frittatas are baked in a mini-muffin pan, so they are perfectly bite-sized. I used the Zingerman’s Arkansas Peppered Bacon that my husband loves, so my attempt at this recipe turned out really peppery. The sour cream really cooled it down, though. I baked the bacon (my preferred method of cooking bacon) at 400°F for about 10 minutes, until crispy. I sautéed the potato in a little olive oil (instead of bacon drippings). If I were making these for myself, I would omit the bacon and substitute some finely diced bell peppers. (I think a number of other veggies would work well too, such as mushrooms, chopped spinach, zucchini, etc.) I think these are a good breakfast or brunch item to take somewhere if you’re serving a crowd.
Mini Bacon and Potato Frittatas
Ingredients
* 2 cups finely chopped peeled baking potato (about 12 ounces)
* 5 bacon slices (uncooked)
* 1/2 cup finely chopped sweet onion
* 1 teaspoon salt, divided
* 1/4 teaspoon dried thyme
* 1/2 cup chopped fresh chives, divided
* 2 tablespoons grated fresh Parmesan cheese
* 1/4 teaspoon freshly ground black pepper
* 7 large egg whites, lightly beaten
* 3 large eggs, lightly beaten
* Cooking spray
* 6 tablespoons fat-free sour cream
Preparation
Preheat oven to 375°.
Place potato in a medium saucepan; cover with water. Bring to a boil; cook 4 minutes or until almost tender. Drain.
Cook bacon in a large nonstick skillet over medium heat until crisp. Remove bacon from pan, reserving 2 teaspoons drippings in pan. Crumble bacon; set aside. Add potato, onion, 1/4 teaspoon salt, and thyme to drippings in pan; cook 8 minutes or until potato is lightly brown over medium-high heat. Remove from heat; cool.
Combine the potato mixture, bacon, remaining 3/4 teaspoon salt, 2 tablespoons chives, cheese, pepper, egg whites, and eggs, stirring well with a whisk. Coat 36 mini muffin cups with cooking spray. Spoon about 1 tablespoon egg mixture into each muffin cup. Bake at 375° for 16 minutes or until lightly brown. Cool 5 minutes on a wire rack. Remove frittatas from muffin cups. Top each with 1/2 teaspoon sour cream and 1/2 teaspoon chives.
Wednesday, September 16, 2009
Everyday Salad: Kate's Fresh Herb Salad & Lemon Vinaigrette
For the first time in my life, I attempted to grow something this summer. This was a risky bet, as I do not have a green thumb. I have no children, pets, or plants, and therefore, no responsibility to tend to anything other than my husband (and well, if I forget to feed or water him, he’ll let me know!). I thought about growing my own herbs a couple summers ago. My mom informed me that I’d need to water them a couple times a day, so I quickly abandoned that idea. But this summer I decided to give it an attempt. I figured that even if I couldn’t keep them alive for long, I’d at least get my money’s worth in the beginning.
We purchased some basil, mint, chives, Italian parsley, and cilantro from the farmers’ market and planted them in a small planter at home. The total cost was under $10, so after just a couple uses, I had already surpassed what I could have purchased for that amount of money at the grocery store. I’m pleased to say that I’ve beengood adequate at remembering to water them. My mint took a little while to get started, but it’s coming in nicely now (and from what others are telling me, it will never go away!). The cilantro has had it, but we had a good run. It has been so convenient and economical to be able to step outside, trim a few leaves, and add fresh homegrown herbs to my dishes.
One evening this summer I was throwing together a salad, and decided to use all of the herbs that I had. I actually just tossed the herbs with some arugula, added a little dressing, and that was it – a delicious, yet simple salad! I started making this salad every night. It is so simple and light. I have so many salad recipes that include lots of cheeses, beans, nuts, dried fruit, etc., which are all quite good, but on a warm summer day, this is refreshing and hits the spot.
In the recipe below, I’ve included pine nuts and Parmigiano-Reggiano to add some texture, but if you’re up for a simplified salad, feel free to omit them. This vinaigrette is my standard dressing that I use on almost all salads. I make a batch and keep it in a mason jar in the refrigerator to last throughout the week. I think the dressing tastes great with just the lemon and the olive oil, but my husband complained that he tasted “too much lemon”, and with the addition of a little honey and Dijon, he likes it very much now! This is a salad that you can get creative with and add your own favorite herbs, cheese, nuts, and/or dried fruits.
Kate's Fresh Herb Salad & Lemon Vinaigrette
Ingredients
For Lemon Vinaigrette:
* 1 lemon (juice and zest)
* ¾ cup extra-virgin olive oil
* ½ teaspoon honey
* ½ teaspoon Dijon mustard
* Kosher salt and freshly ground black pepper, to taste
For Fresh Herb Salad:
* 8 cups loosely packed arugula
* ½ cup fresh herbs (such as basil, cilantro, chives, Italian parsley), coarsely chopped
* 2 green onions, chopped
* ¼ cup Parmigiano-Reggiano, grated
* ¼ pine nuts, toasted
Directions
Zest half of the lemon, and combine with juice from entire lemon, olive oil, mustard, honey, salt, and pepper. Either whisk ingredients together in a small bowl, or combine ingredients in a container with a sealable top (such as a mason jar) and shake until all ingredients are incorporated. (The vinaigrette will keep in the refrigerator for several weeks.)
In a large bowl, toss arugula with green onions, fresh herbs, and a couple tablespoons of dressing, so lettuce is just barely coated. Arrange salad mixture on individual plates, and to garnish, sprinkle each salad with cheese, pine nuts, and freshly ground black pepper, if desired.
We purchased some basil, mint, chives, Italian parsley, and cilantro from the farmers’ market and planted them in a small planter at home. The total cost was under $10, so after just a couple uses, I had already surpassed what I could have purchased for that amount of money at the grocery store. I’m pleased to say that I’ve been
One evening this summer I was throwing together a salad, and decided to use all of the herbs that I had. I actually just tossed the herbs with some arugula, added a little dressing, and that was it – a delicious, yet simple salad! I started making this salad every night. It is so simple and light. I have so many salad recipes that include lots of cheeses, beans, nuts, dried fruit, etc., which are all quite good, but on a warm summer day, this is refreshing and hits the spot.
In the recipe below, I’ve included pine nuts and Parmigiano-Reggiano to add some texture, but if you’re up for a simplified salad, feel free to omit them. This vinaigrette is my standard dressing that I use on almost all salads. I make a batch and keep it in a mason jar in the refrigerator to last throughout the week. I think the dressing tastes great with just the lemon and the olive oil, but my husband complained that he tasted “too much lemon”, and with the addition of a little honey and Dijon, he likes it very much now! This is a salad that you can get creative with and add your own favorite herbs, cheese, nuts, and/or dried fruits.
Kate's Fresh Herb Salad & Lemon Vinaigrette
Ingredients
For Lemon Vinaigrette:
* 1 lemon (juice and zest)
* ¾ cup extra-virgin olive oil
* ½ teaspoon honey
* ½ teaspoon Dijon mustard
* Kosher salt and freshly ground black pepper, to taste
For Fresh Herb Salad:
* 8 cups loosely packed arugula
* ½ cup fresh herbs (such as basil, cilantro, chives, Italian parsley), coarsely chopped
* 2 green onions, chopped
* ¼ cup Parmigiano-Reggiano, grated
* ¼ pine nuts, toasted
Directions
Zest half of the lemon, and combine with juice from entire lemon, olive oil, mustard, honey, salt, and pepper. Either whisk ingredients together in a small bowl, or combine ingredients in a container with a sealable top (such as a mason jar) and shake until all ingredients are incorporated. (The vinaigrette will keep in the refrigerator for several weeks.)
In a large bowl, toss arugula with green onions, fresh herbs, and a couple tablespoons of dressing, so lettuce is just barely coated. Arrange salad mixture on individual plates, and to garnish, sprinkle each salad with cheese, pine nuts, and freshly ground black pepper, if desired.
Tuesday, September 15, 2009
Sunset Magazine: Miso-Glazed Eggplant
As a way to use up some frequent flyer miles, an airline provided my mother with subscriptions to a variety of different magazines. Lucky for me, she passes them on once she and my father have read them. Last week I was thumbing through her most recent stack and began to read through a magazine I had never seen before, Sunset ("the ultimate Western lifestyle"). The magazine covers food, wine, home, gardening, travel, and traveling for thirteen western states. After realizing the focus of the magazine, I quickly became engrossed. You may have noticed I’ve been posting a lot about our time in California. The past couple years have provided my first -of several- trips to the previously unexplored west coast – and I find it to be a rather fascinating place. Although I have only read one issue of Sunset Magazine to date, I am anticipating that this will become a new favorite read for me.
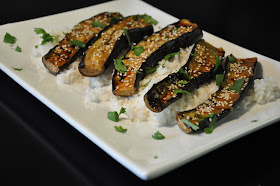
I read through several recipes in the September issue which I quickly flagged. I took advantage of the ripe eggplant at the farmers’ market last weekend to make their miso-glazed eggplant. This recipe is fairly easy, however it may require some ingredients that you don’t typically keep on hand (such as miso, sesame seeds, and sake). I opted to use white wine instead of sake (per their suggestion), yellow miso, and Italian eggplant (at the market they looked better than the Japanese eggplant). The recipe calls for you to broil the eggplant, however we grilled them on both sides, then coated them with the miso mixture, popped them under the broiler for about 3 minutes to caramelize the glaze. We served this on top of steamed white rice.
Miso-Glazed Eggplant (Nasu Miso)
Submitted by Scott Lorenz, Scotts Valley, CA, Sunset, September 2009
Ingredients
* 3 tablespoons vegetable oil
* 4 Japanese eggplant (about 1 1/2 lbs. total), cut in half lengthwise and flesh scored 1/4 in. deep
* 1/3 cup yellow or red miso*
* 2 tablespoons packed light brown sugar
* 2 tablespoons sake or white wine
* 1/4 teaspoon red chile flakes
* 1/4 cup cilantro leaves
* 1 teaspoon toasted sesame seeds
Preparation
1. Preheat broiler with a rack 4 in. from heat source. Heat oil in an ovenproof frying pan over high heat. Add eggplant, flesh side down, and cook until flesh starts to brown and soften, about 4 minutes.
2. In a small bowl, combine miso, sugar, sake, and chile flakes. Turn eggplant flesh side up and brush mixture over it. Broil eggplant in pan until glaze starts to brown, about 3 minutes. Sprinkle with cilantro and sesame seeds.
*Look for miso, a fermented soybean paste, in the refrigerator aisle of your produce section.