Showing posts with label Sour Cream. Show all posts

Sunday, February 7, 2010

Superbowl Sunday: Sweet Potato & Black Bean Chili

It is Superbowl Sunday, and the first one in several years that we are not watching the commercials game at my sister’s house. After a weekend packed full of obligations and chores, we needed a few hours at home this evening to get our wits about us before beginning another long week. (Okay, I needed a few hours at home and my husband was kind enough to find contentment in watching the game from our own couch.)

My sister usually makes a chili and a fish stew to serve for her party guests during the Superbowl, followed by fondue or another fun dessert. My husband and I just finished off my second batch of Cioppino, so I opted to make some chili for us to eat tonight. A few weeks ago I found a recipe online for a vegetarian chili that calls for black beans and sweet potatoes – two of my favorite foods (that fortunately pair so well together, like in Sweet Potato & Black Bean Burritos).

I made this yesterday, and completed it today by stirring in the cilantro and garnishing with some cheese, sour cream, and diced avocado. The recipe is quite simple, and you can feel free to adjust the seasonings to your own taste buds (the chipotle powder will make it smoky and spicy!). The recipe states that it serves two, so I doubled it. I wound up with a good amount that will last us into the week. I hope that your Superbowl Sunday was filled with some good eats, regardless of where you happened to be!

Sweet Potato & Black Bean Chili
(From Eating Well)
Serves 2
Ingredients
2 teaspoons extra-virgin olive oil
1 small onion, finely diced
1 small sweet potato, peeled and diced
2 cloves garlic, minced
1 tablespoon chili powder
2 teaspoons ground cumin
¼ teaspoon ground chipotle chile (Chipotle peppers are dried, smoked jalapeno peppers. Ground chipotle can be found in the specialty spice section of most supermarkets.)
1/8 teaspoon salt, or to taste
1 1/3 cups water
1 (15-ounce) can black beans, drained and rinsed
1 cup canned diced tomatoes
2 teaspoons lime juice
2 tablespoons chopped fresh cilantro

Directions
Heat oil in a large saucepan over medium-high heat. Add onion and potato and cook, stirring often, until the onion is slightly softened, about 4 minutes. Add garlic, chili powder, cumin, chipotle and salt and cook, stirring constantly, until fragrant, about 30 seconds. Add water, bring to a simmer, cover, reduce heat to maintain a gentle simmer and cook until the potato is tender, 10 to 12 minutes. Add beans, tomatoes and lime juice; increase heat to high and return to a simmer, stirring often. Reduce heat to maintain a simmer and cook until slightly reduced, about 4 minutes. Remove from the heat and stir in cilantro.


Sunday, January 31, 2010

Irish Car Bombs: Chocolate Whiskey and Beer Cupcakes

We have returned from our third annual ski trip. Three years ago was my first time strapping on skis, and defying everyone’s expectations – I loved it! I made my way through the green circles and enjoyed almost every minute! Last year, skiing in sub-zero temperatures, I accomplished my goal of skiing on the blue squares, and actually completed every blue trail at the resort. My 2010 goal: Black Diamond. I am pleased to report that I can now check that box. Sandwiched between my brother-in-law paving the way ahead of me, and my husband trailing behind me, I made it down a few times without any major spills, and all in one piece. The other skiers on that trail could certainly tell that I didn’t belong in their league, but with a proud grin I was the one pumping my fists at the bottom of the hill!

We had a great time with my sister and brother-in-law, and while we had some good food for most of the weekend, I had undoubtedly the worst pizza in my life last night for dinner. Seriously, how do you mess up pizza? (And I only ordered it after the waitress unwaveringly recommended it!) We made it back home today with time for me to make some warm Cioppino and a post-birthday treat for my husband to take to work tomorrow. Remember the days of bringing cupcakes to school for your birthday? This is the adult version.

While I’ve never had one myself, I’ve seen plenty of Irish Car Bombs enjoyed by others. It’s a drink where Irish whiskey is floated on the top of Irish Cream in a shot class and then dropped directly into a pint glass of stout. The drink is then consumed immediately before the ingredients curdle.

These cupcakes use the ingredients of an Irish Car Bomb, and are extremely delicious! I made these cupcakes last summer and sent them to work with my husband before we consumed them entirely ourselves. There were a huge hit at his office, and I received requests to share the recipe and send more! The Guinness gets baked out, but the Bailey’s and Whiskey do not. If you’re serving for people who cannot/do not consume alcohol, you can omit the Whiskey from the ganache and substitute milk or heavy cream for the Bailey’s. You can simply spread the frosting on the top of the cupcakes, or you can use a star tip with a piping bag to create a fun design. These are rich enough as is, but you can also decorate with colored sugar/sprinkles, or chocolate shavings.

Chocolate Whiskey and Beer Cupcakes
(Adapted from Smitten Kitchen)
Makes 20 to 24 cupcakes
Ingredients
For the Guinness Chocolate Cupcakes:
1 cup stout (such as Guinness)
1 cup (2 sticks) unsalted butter
¾ cup unsweetened cocoa powder
2 cups all purpose flour
2 cups sugar
1 ½ teaspoons baking soda
¾ teaspoon salt
2 large eggs
2/3 cup sour cream

Ganache Filling:
8 ounces bittersweet chocolate
2/3 cup heavy cream
2 tablespoons butter, room temperature
2 teaspoons Irish whiskey

Bailey’s Frosting: (you may want to double this)
3 to 4 cups confections sugar
1 stick (1/2 cup or 4 ounces) unsalted butter, at room temperature
3 to 4 tablespoons Bailey's Irish Cream

Special equipment: 1-inch round cookie cutter or an apple corer and a piping bag (Kate uses a plastic bag with the corner snipped off)

Directions
Make the cupcakes: Preheat oven to 350°F. Line 24 cupcake cups with liners. Bring 1 cup stout and 1 cup butter to simmer in heavy large saucepan over medium heat. Add cocoa powder and whisk until mixture is smooth. Cool slightly.

Whisk flour, sugar, baking soda, and ¾ teaspoon salt in large bowl to blend. Using electric mixer, beat eggs and sour cream in another large bowl to blend. Add stout-chocolate mixture to egg mixture and beat just to combine. Add flour mixture and beat briefly on slow speed. Using rubber spatula, fold batter until completely combined. Divide batter among cupcake liners, filling them 2/3 to ¾ of the way. Bake cake until tester inserted into center comes out clean, rotating them once front to back if your oven bakes unevenly, about 17 minutes. Cool cupcakes on a rack completely.

Make the filling: Chop the chocolate and transfer it to a heatproof bowl. Heat the cream until simmering and pour it over the chocolate. Let it sit for one minute and then stir until smooth. (If this has not sufficiently melted the chocolate, you can return it to a double-boiler to gently melt what remains. 20 seconds in the microwave, watching carefully, will also work.) Add the butter and whiskey (if you’re using it) and stir until combined.

Fill the cupcakes: Let the ganache cool until thick but still soft enough to be piped (the fridge will speed this along but you must stir it every 10 minutes). Meanwhile, using your 1-inch round cookie cutter or an apple corer, cut the centers out of the cooled cupcakes. You want to go most of the way down the cupcake but not cut through the bottom — aim for 2/3 of the way. A slim spoon or grapefruit knife will help you get the center out. Those are your “tasters”. Put the ganache into a piping bag with a wide tip and fill the holes in each cupcake to the top.

Make the frosting: Whip the butter in the bowl of an electric mixer, or with a hand mixer, for several minutes. You want to get it very light and fluffy. Slowly add the powdered sugar, a few tablespoons at a time.

When the frosting looks thick enough to spread, drizzle in the Baileys (or milk) and whip it until combined. If this has made the frosting too thin beat in another spoonful or two of powdered sugar.

Ice and decorate the cupcakes.

Do ahead: You can bake the cupcakes a week or two in advance and store them, well wrapped, in the freezer. You can also fill them before you freeze them. They also keep filled — or filled and frosted — in the fridge for a day. (Longer, they will start to get stale.)


Saturday, January 2, 2010

Sister's Spinach Dip: Spinach and Artichoke Dip

Happy New Year! I hope that you had an exciting New Year’s Eve, and a peaceful start to your new year. I am excited to see what 2010 will bring!

New Year’s Eve is a holiday that I have mixed feelings about. It holds a special place in my heart, as my husband proposed to me on New Year’s Eve eight years ago. Some years I feel like getting dressing up in a little black dress and attending (or hosting) a fabulous party, while other years I prefer sitting on my couch in my pajamas. This year we found a happy medium.

My sister hosted us and another couple (who are such good friends we consider them to be family) at her house. We set out a couple appetizers and played with her young kids. After we put them to bed, we dined on a lovely meal (she made surf ‘n’ turf with beef tenderloin and shrimp) followed by chocolate fondu. We wore comfy clothes and lounged around until the ball dropped.

The day before New Year’s Eve, my sister and I divided up a list of grocery items. She would be visiting a specialty grocery store to purchase the meat, seafood, and wine, while I was planning to go to a basic grocery store for everyday items. My sister was planning on making her go-to spinach dip, but as it was necessary for me to pick up practically all of her ingredients during my grocery run, she suggested that I just make it instead.

Spinach dip seams to be a well-loved appetizer in whatever form it may come in. I have many good memories with high school friends picking up a pre-made container from the grocery deli section and eating it with a loaf of Hawaiian bread. My sister’s version is from Cooking Light and is best when served bubbling hot with tortilla chips.

Spinach and Artichoke Dip
(Adapted from Cooking Light, September, 2007)
Ingredients
2 cups (8 ounces) shredded part-skim mozzarella cheese, divided
½ cup fat-free sour cream
¼ cup (1 ounce) grated fresh Parmesan cheese, divided
¼ teaspoon black pepper
2 garlic cloves, minced
1 (14-ounce) can artichoke hearts, drained and chopped
1 (8-ounce) block 1/3-less-fat cream cheese, softened
1 (8-ounce) block fat-free cream cheese, softened
1 (12-ounce) package frozen chopped spinach, thawed, drained, and squeezed dry
1 (13.5-ounce) package baked tortilla chips (about 16 cups)

Directions
Preheat oven to 350° F.

Combine 1 ½ cups mozzarella, sour cream, 2 tablespoons Parmesan, and next 6 ingredients (through spinach) in a large bowl; stir until well blended. Spoon mixture into a 1 ½-quart baking dish. Sprinkle with remaining ½ cup mozzarella and remaining 2 tablespoons Parmesan.

Bake at 350° for 30 minutes or until bubbly and golden brown. Serve with tortilla chips.


Monday, December 7, 2009

Breaded Not Burnt: Best Baked Chicken

When my sister and I were growing up, there were days when we would arrive home before our mother made it home from work. Our mom would sometimes leave us with an easy recipe to get dinner started, or she would have prepped a meal for us to finish off in the oven. It was the beginning of a passion for cooking for us both!

One of the meals we occasionally assisted in was a baked chicken recipe. The chicken breasts were coated in instant potato flakes and baked. On one particular day, my sister happened to burn the chicken and subsequently, it was forever named after her. From that point forward, we continued to call that chicken “The Chicken that [Insert Sister’s Name] Burnt”. Even years later, we would say to our mom, “What are we having for dinner tonight?”, and she would respond, “The Chicken that [Sister] Burnt”.

This recipe isn’t the chicken that she burnt, but quite similar, and much better too. Instead of potato flakes, it is coated in herb-seasoned stuffing. My mom shared this recipe a couple years ago, after my husband tasted her chicken and loved it. After making several rounds of it for him, I tried it myself by using Quorn Naked Chik'n Cutlets, and also enjoyed it. It’s pretty easy to make, and you can bake as many or as few chicken breasts as you want to. I recommend using Pepperidge Fram Herbbed Stuffing for your bread crumbs. I make this on a regular basis for my husband, alternating which vegetable sides I pair it with (on this day it was Broccoli with Myer Lemon Olive Oil and sweet potato fries).

Best Baked Chicken
(From All Recipes)
Ingredients
8 skinless, boneless chicken breast halves
1 cup sour cream
2 tablespoons fresh lemon juice
2 teaspoons soy sauce
2 teaspoons celery salt
2 teaspoons garlic salt
1 dash pepper
1 (6 ounce) package herb-seasoned stuffing mix, crushed into crumbs
1/2 cup butter, melted

Directions
Preheat oven to 375° F. Lightly grease a baking dish.

In a medium bowl, mix the sour cream, lemon juice, soy sauce, celery salt, garlic salt, and pepper. Dip each chicken breast in the sour cream mixture, then roll in the stuffing mix to coat.

Arrange chicken in the prepared baking dish. Drizzle with the melted butter.

Bake 40 to 50 minutes in the preheated oven, until the chicken is no longer pink and the juices run clear.

Thursday, November 19, 2009

Best Chili Ever: Quinoa Chili

Are you sick of quinoa yet? Because I am certainly not! I keep trying out new recipes of this wonder-grain, and I can’t seem to get enough of it. Just the other week my friend, Beth, forwarded me a recipe for Quinoa Chili. I was rather anxious to try it, because I’ve eaten at Beth’s place before, and I know that she is an excellent cook. At a mid-summer dinner that she and her husband hosted me and my husband for, she prepared our entire scrumptious meal from scratch, including the corn tortillas!

The Quinoa Chili goes together easily, and it is delicious! This is the best vegetarian version of chili that I have ever had. It is hearty yet healthy, and I am so thankful that Beth sent this one my way! You can gave fun with the garnishes, and add whatever you like.


Quinoa Chili

Ingredients
1 Tbsp olive oil
1 medium onion, chopped
3 carrots, chopped
3 stalks celery, chopped
1 teaspoon salt
2 cloves garlic, minced
1 large green pepper, diced
2 teaspoon cumin
1-2 teaspoon chili powder
1 teaspoon dried oregano
1/4 teaspoon cinnamon
1/8 teaspoon cayenne
2/3 cup quinoa, rinsed in warm water and drained
1 cup fresh or frozen corn
2 (14 oz.) cans tomato sauce
1 (14 oz.) can small diced tomatoes
1 cup vegetable broth or water
1 (14 oz.) can kidney beans, rinsed and drained (I sometimes substitute with black beans)

Directions
Heat oil in a Dutch oven or large skillet on medium heat. Add onion, carrots, celery, salt, garlic, green pepper and spices; sauté 5 to 10 minutes. Add rinsed uncooked quinoa and stir in. Add corn, tomatoes, tomato sauce and vegetable broth/water to onion and quinoa mixture. Cover and simmer together 20 minutes. Add kidney beans; simmer another 10 minutes.

If chili is too thick, just add water or more vegetable broth until it is to your liking.

Toppings: shredded cheese, sour cream, avocado, corn chips, green onions.


Sunday, November 8, 2009

Two for Two: Grilled Chicken & Avocado Sandwich, and Chicken Quesadillas with Avocado Cream

I’m back. In the kitchen, that is. After an embarrassing amount of time eating take-out, I found some time today to venture to the three grocery stores and back into my kitchen. To my delightful surprise, while I was at the store my mother stopped by to drop off some more homemade food (vegetable pot pie, which I am so excited to try!). My family has a way with food, and in times of need (sickness, loss of loved ones, births of babies, moving, returning from a trip, etc.) we provide each other with healthfully prepared homemade meals. Thanks, Mom!

My first order of business in the kitchen was to help out a friend in need. “Sunny” and I go way back (definitely first grade, and if I could find a class photo, I might be able to confirm kindergarten too). She is married to her high school sweetheart (I was privileged to witness their budding romance in the high school Honors English class we all took together), and they currently reside in Seattle.

In March I took a business-related trip to Seattle, and my husband tagged along as it was a destination previously unexplored to us both, but on our list of places to visit. We used our time in town to get together with Sunny. We met her, her husband, and their adorable little boy for brunch. They picked a fantastic brunch spot, and if you’re in the Seattle area, I definitely recommend Table 219. We got to witness their son’s first taste of one of my favorite foods, sweet potato fries. Even more notable, though, was his first taste of a grapefruit, and none of the adults at the table could grasp why this little one-year-old seemed so keen on such a tart and bitter taste.


Sunny has since shared the exciting news that they will be expanding their family by two! With twin baby boys on the way she is needing to up her caloric intake, however this carb-o-holic has been having an aversion to practically all food! I asked if I could help in any way, and she said that she had some mediocre guacamole at a restaurant and it agreed with her stomach. She asked for a recipe with avocado and some chicken (to add protein). I have two, and they also offer up some calcium (cheese), carbs (sandwich rolls and tortillas), and veggies (carrots, tomatoes).

The first recipe is a chicken sandwich that works well when you’re having company. There is little prep work, and the sandwiches can be assembled by each guest. It is easy to up the quantity, and grill a lot of chicken breasts for a large crowd. If you’re (having twins and) looking to add some more protein, fat, and calories, you can add bacon too! (You can also add an extra slice of cheese.)

Kate's Grilled Chicken and Avocado Sandwich
Ingredients
* 4 skinless, boneless chicken breasts
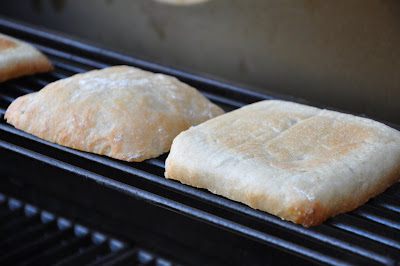
* 4 sandwich rolls (I used ciabatta rolls, but hamburger buns will work too)
* 1 cup Italian salad dressing
* 1 beefsteak tomato, sliced
* 1 large avocado, sliced
* 1 lime or lemon, zest and juice
* ½ cup mayonnaise
* 4 slices provolone cheese

Directions
Marinate chicken in salad dressing for 1-2 hours in the refrigerator. Preheat grill. Grill chicken breasts for about 5-6 minutes on each side, or until thoroughly cooked; the meat should be solid white throughout. Grill sandwich rolls, cut side down, for about 2-3 minutes, until bread is toasted.

Meanwhile, in a small bowl combine lime or lemon zest, juice, and mayonnaise.

Assemble sandwiches, placing on each sandwich roll: one chicken breast, one slice of cheese, 2 slices on tomato, 2 tbsp. mayonnaise mixture, several slices of avocado.


The second recipe is a new one that I just tried. The final product looked (and smelled) so good to me that I think I’m going to have to make it again as a vegetarian version so that I can try it too. The recipe is from Cooking Light, and includes a fruit salsa. It was too difficult to find the exotic fruits it calls for in the Midwest in November, so I omitted it altogether. Sunny, you may want to use regular sour cream instead of fat-free. These will work as an entrée, appetizer, or hors d'oeuvre.

Chicken Quesadillas with Avocado Cream
(Adapted from Cooking Light, July 1998)
Ingredients
* Cooking spray
* 1 1/3 cups shredded carrot
* 1 cup thinly sliced green onions
* 1 cup (4 ounces) shredded Monterey Jack cheese with jalapeño peppers, divided
* 8 (8-inch) fat-free flour tortillas
* 2 cups chopped ready-to-eat roasted skinned, boned chicken breasts (such as Tyson; about 2 breasts)
* 1/2 cup fresh cilantro leaves
* Avocado Cream (recipe follows)

Directions
Place a large nonstick skillet coated with cooking spray over medium-high heat until hot. Add shredded carrot and onions; sauté 5 minutes or until tender. Sprinkle 2 tablespoons shredded cheese over each of 4 tortillas, and divide carrot mixture evenly over tortillas. Top each tortilla with 1/2 cup chicken, 2 tablespoons cilantro leaves, and 2 tablespoons cheese, and top with a tortilla.

Place skillet coated with cooking spray over medium heat until hot. Add 1 quesadilla, and cook 2 minutes on each side or until quesadilla is browned. Repeat with the remaining quesadillas. Cut each quesadilla into 6 wedges. Arrange 4 quesadilla wedges on each of 6 plates. Top each serving about 3 tablespoons Avocado Cream.


Avocado Cream
Ingredients
* 1 peeled medium avocado, pitted and cut into chunks
* 1/2 cup fat-free sour cream
* 2 tablespoons fresh lime juice
* 2 tablespoons minced fresh cilantro

Directions
Place first 3 ingredients in a blender; process until smooth. Spoon pureed mixture into a small bowl; stir in cilantro. Cover and chill.


UPDATE: She liked it!!!

Monday, September 28, 2009

Blackout Dip: Kate’s Layered Taco Dip

I find myself making my layered taco dip frequently for gatherings. It’s a popular dish that everyone seems to enjoy. My husband loves it too. I used to make a batch for the two of us to sit down and eat for dinner. In fact during the first night of the Northeast Blackout in August 2003, we sat on our couch in our Manhattan apartment finishing the layered taco dip we had started the night before (that would have spoiled in the fridge), and drinking the leftover margaritas (that would have melted in the freezer).

This is a flexible dip, as different layers can be added and omitted based on your personal preferences. I think everyone has their own version of Layered Taco Dip. Some include seven layers; some have nine. I have seen some recipes that mix cream cheese with sour cream. When I made this the other day, I actually added Greek yogurt as I was short on sour cream. Whichever way you choose to make yours, I beg you leave out the black olives if you’re serving to a crowd. I find it hard to find someone who is a fan of black olives. If you ever watch people at a party eating layered taco dip, notice how they take their tortilla chips and try to scoop around the olives, leaving a pile of black olives for clean up. You can hold the olives, and instead garnish with chives, green onion, cilantro, and/or chopped jalapeño. This dip doesn't keep well for long, so it's best to make this right before serving.

Kate’s Layered Taco Dip
Ingredients
1 (16 oz.) can refried beans (I use fat free vegetarian beans)
1 (16 oz.) container of light sour cream
1 (1 oz.) package low-sodium taco seasoning
½ recipe Kate’s Chunky Guacamole
2 cups shredded cheese (Mexican or Taco variety – one that includes Monterrey Jack and Cheddar)
3 tomatoes, diced
¼ cup chopped chives or green onion

Directions
Remove beans from can and to remove excess liquid, drain in a colander lined with paper towel. Spread beans on a large platter.

In a small bowl, mix sour cream with taco seasoning. Spread on top of beans, leaving the edge of the beans visible.

Make ½ recipe of Kate’s Chunky Guacamole. Carefully spread on top of sour cream, leaving the edge visible.

Sprinkle cheese on top of guacamole, and top with tomatoes. Garnish with chives or green onion. Serve immediately with tortilla chips.

Sunday, September 20, 2009

Time to Tailgate: Mini Bacon and Potato Frittatas

I’ve never really caught on to the whole tailgating bandwagon. First, I like to sleep in. Waking up early on a Saturday morning for a sporting event is a concept that makes no sense to me. Second, beer doesn’t taste good to me anytime of day, let alone before noon. Third, tailgating makes a day with a long football game incredibly longer and with the weekends seeming to go by quicker each year, my time on a Saturday to run errands and do chores is precious. So while my husband makes a day of it each football Saturday, I’ll join in just once in a while.

One of those days happened to be last Saturday. We went out to cheer on our favorite football team to our third victory this season!!! It was a beautiful September day, and we had plans to visit one of my husband’s friend and colleague’s tailgates. “J”’s tailgates are actually a great stop before the game. His tailgate spot is about a block from the stadium, and J makes delicious egg and English muffin sandwiches on his grill. They are delicious.

As it was an earlier game that day, I decided to bring breakfast fare. I also wanted it to be finger food to cut out the need for utensils. I came across a recipe from Cooking Light. I hadn’t tried it before, but learned that my sister had previously made it. These mini frittatas are baked in a mini-muffin pan, so they are perfectly bite-sized. I used the Zingerman’s Arkansas Peppered Bacon that my husband loves, so my attempt at this recipe turned out really peppery. The sour cream really cooled it down, though. I baked the bacon (my preferred method of cooking bacon) at 400°F for about 10 minutes, until crispy. I sautéed the potato in a little olive oil (instead of bacon drippings). If I were making these for myself, I would omit the bacon and substitute some finely diced bell peppers. (I think a number of other veggies would work well too, such as mushrooms, chopped spinach, zucchini, etc.) I think these are a good breakfast or brunch item to take somewhere if you’re serving a crowd.

Mini Bacon and Potato Frittatas

Ingredients
* 2 cups finely chopped peeled baking potato (about 12 ounces)
* 5 bacon slices (uncooked)
* 1/2 cup finely chopped sweet onion
* 1 teaspoon salt, divided
* 1/4 teaspoon dried thyme
* 1/2 cup chopped fresh chives, divided
* 2 tablespoons grated fresh Parmesan cheese
* 1/4 teaspoon freshly ground black pepper
* 7 large egg whites, lightly beaten
* 3 large eggs, lightly beaten
* Cooking spray
* 6 tablespoons fat-free sour cream

Preparation
Preheat oven to 375°.

Place potato in a medium saucepan; cover with water. Bring to a boil; cook 4 minutes or until almost tender. Drain.

Cook bacon in a large nonstick skillet over medium heat until crisp. Remove bacon from pan, reserving 2 teaspoons drippings in pan. Crumble bacon; set aside. Add potato, onion, 1/4 teaspoon salt, and thyme to drippings in pan; cook 8 minutes or until potato is lightly brown over medium-high heat. Remove from heat; cool.

Combine the potato mixture, bacon, remaining 3/4 teaspoon salt, 2 tablespoons chives, cheese, pepper, egg whites, and eggs, stirring well with a whisk. Coat 36 mini muffin cups with cooking spray. Spoon about 1 tablespoon egg mixture into each muffin cup. Bake at 375° for 16 minutes or until lightly brown. Cool 5 minutes on a wire rack. Remove frittatas from muffin cups. Top each with 1/2 teaspoon sour cream and 1/2 teaspoon chives.